


Nearly 200 people showed up live to talk about all things Substack lives. Thank you, Naomi Alderman, Alyssa Polizzi, Dr. Amber Hull, and many others for joining me.
Here are all the details. Timestamps are below.
Substack live particulars
“Live Video” lets you stream in real time; the “Recording Studio” lets you record videos (solo or with guests) without going live.
You need a strong internet connection.
If you go live on your phone, make sure it’s fully charged (!).
Google Chrome is best; Safari works but has limitations.
Scheduling
» On your desktop, click “Create,” then select “Live.”
» On mobile, tap the orange + and select “Live.” Grant camera and microphone access when prompted.
From there, the setup is the same whether you’re on desktop or mobile:
Add a title. This is what shows up in your subscribers’ push and email notifications—don’t skip it. Lives with no title give people no reason to show up.
Choose your audience: everyone, all subscribers, or paid only. For your first few, opening it to all subscribers lets you build the habit before paywalling it.
Decide on email notifications. People are notified via the app regardless. Sending an additional email when you go live can lead to unsubscribes—but it’s your call.
Invite a co-host if you want one. On desktop, they can join from desktop or the app. On mobile, you can have up to two co-hosts—search by their full name or Substack handle. If you can’t find someone, they may have notifications disabled; DM them directly.
Schedule ahead if you’d like. On desktop, toggle “Schedule for later” in the right dashboard. On mobile, tap “Save” and your date/time picker will appear. You can schedule anywhere from 15 minutes to three months out. There’s a minimum lead time if you want to send a calendar invite.
Before you go live
Enter the preview room to test your video and audio. If you’ve invited a co-host, they’ll join the preview room automatically once they accept. Keep your face within the “visible area on mobile” frame—it makes a real difference for app viewers.
Under Brand Effects, you can display your logo, wordmark, or a custom file. Your QR code lives under Settings—search for it there and download it if you want to use it as your brand overlay.
Going live
Click or tap “Go Live.” It takes about seven seconds before you’re officially on—the loop viewers see while it’s connecting is your pre-show, so be aware of what you’re doing in that moment. You’ll see a red “LIVE” pill when you’re streaming.
To share your screen on desktop, click “Share screen” from the preview room. Chrome lets you share a tab, a window, or your full screen. Enable picture-in-picture permissions to stay visible while sharing. Screen sharing is desktop only.
To end the stream, click “End” in the top left. Your recording saves automatically as a draft.
After your live
Your recording can go out to subscribers immediately or stay in drafts—depending on what you chose during setup. If you publish immediately, it goes out with a default thumbnail that’s not great. If you keep it in drafts, you can add a paywall, edit the body, swap the thumbnail, and publish it like any other post. Find it under Posts > Drafts on desktop.
Substack generates clips right after your stream ends. Dynamic editing trims dead air, highlights the active speaker, and adds subtle zooms. Clean title cards give each clip a polished opening. If you’ve connected YouTube or your podcast platform, you can publish directly from there.
Substack also creates a full transcript automatically.
Where lives live on the dashboard
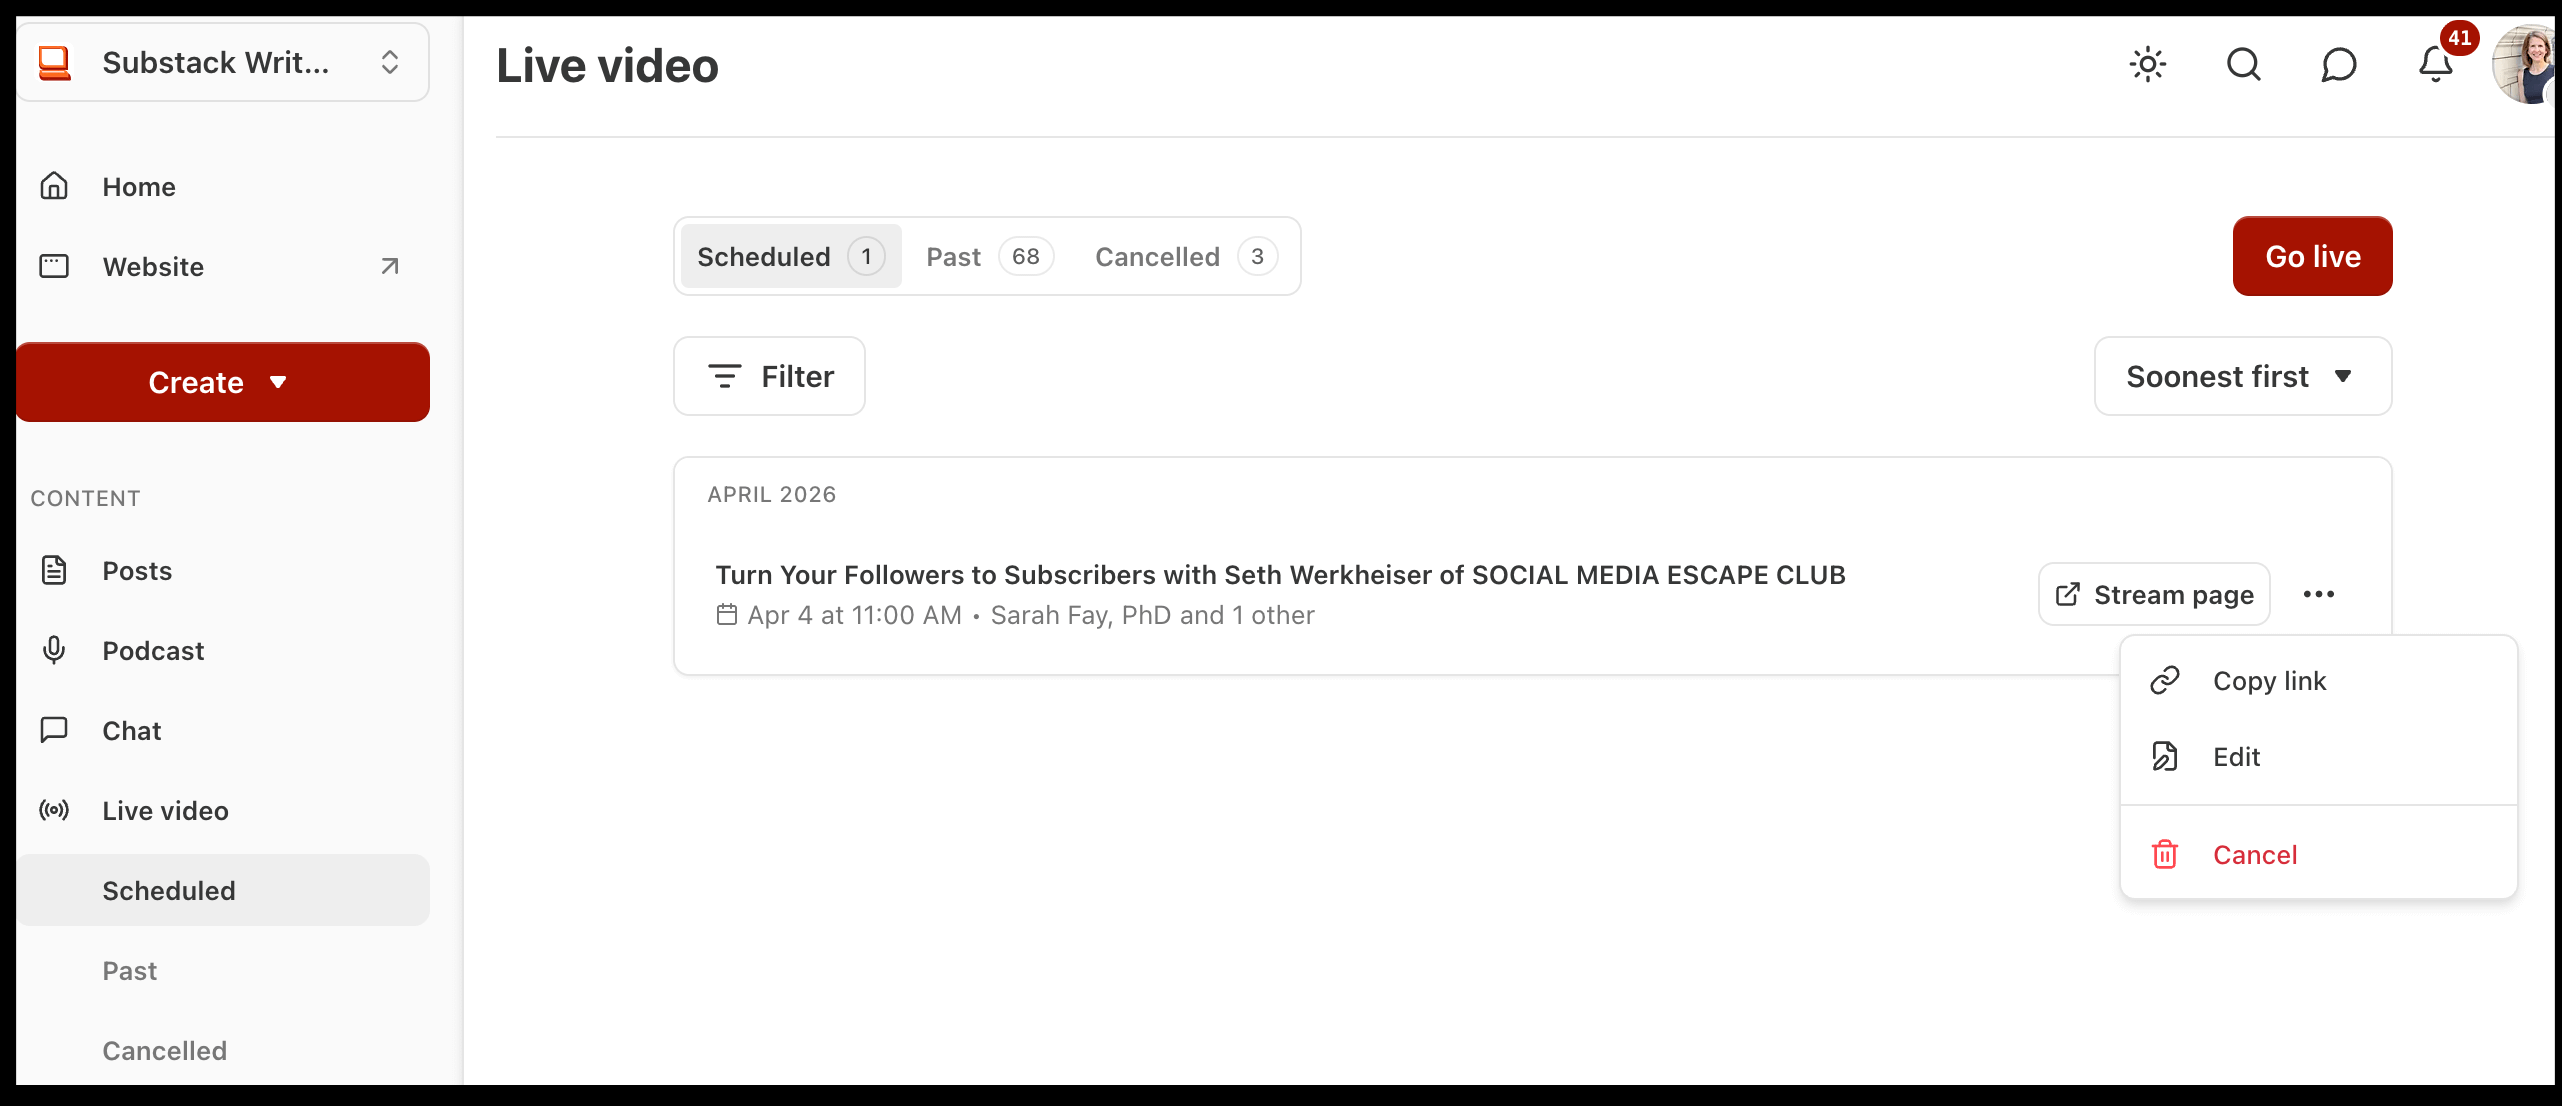
You can access your scheduled, past, and cancelled lives and get the link to share any time on your dashboard: Dashboard > Live video.
Video resources and equipment
Lighting
This is the best thing I’ve ever bought—desk lamp that also provides excellent webcam lighting: LUME CUBE Edge 2.0 LED Desk Lamp
EMART 10” Ring Light with 55” Extendable Tripod Stands and Phone Holder, Dimmable LED Circle Round Light for Selfie Camera Photography/Makeup/YouTube Video/Vlogging/Live Streaming
Mic
Audio-Technica ATR2100x-USB Cardioid Dynamic Microphone (ATR Series)USB and XLR Outputs, Silver
Camera
Mine is excellent: Logitech Brio 4K Webcam

Doors are open for How to Use Substack to Sell Your Book Masterclass for Traditionally and Hybrid Published Authors: Attend on either date—Saturday, March 28, 1 - 3 PM CT OR Friday, April 3, 10 - noon CT. Get more information and enroll here:

Our homepage | 24/7 Substack Chat | Workshop Library | Archive | Manage your subscription | 2026 Notes Boost | Premier | Writers at Work Studio | Substack Strategy Sessions 1:1
Timestamps:
00:00 Why Lives Work
01:03 Set Goals First
01:50 Do Lives Convert
02:43 Desktop Setup Walkthrough
04:21 Recording Studio vs Live
05:36 Audience Titles Emails
07:12 Invites Screen Share Safari
08:41 Going Live Loop Preview
09:12 Save Drafts Publish Clips
10:40 App Scheduling Walkthrough
13:25 Turn Live Into Post
14:46 Clips Transcript Formatting
16:26 Q&A Gear And Lighting
17:23 Branding Logos QR Codes
18:36 Wrap Up Thanks


